
Neo Geo CD Modification Guide
Important: Damage may occur to your Neo Geo CD console if not handled properly. Please follow this modification guide at your own risk. For additional support and discussions, visit the dedicated Neo Geo CD Forum.
This Neo Geo CD modification guide shows you the procedure for changing your console’s language, adding a switch to change between languages, changing the frame rate from 50Hz to 60Hz (PAL console) and for adding a switch to change between frame rates as well.
The unit shown is a EUR Neo Geo CD Top Loader, but the same principles apply for the JAP and USA consoles as well. The Front Loader and the CDZ have some differences but you may be able to modify it successfully.
Language Modification
First make sure that your unit is unplugged. Remove the four screws located at the bottom of the console.
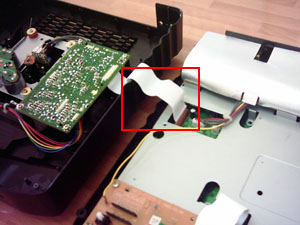
Now open the console lifting it from the right as there is a cable on the left side that gets in the way. This cable can be unplugged if it bothers, but it’s not necessary. Flip the top part and leave it as shown.
Look at the brown board at the bottom, where the controller ports are. On the left side you’ll see the country code.

The “O” represents a jumper, there must be one in the indicated place for the USA and EUR consoles and none for the JAP one (this is just a representation), on the right side of the board you’ll find the physical jumper (it’s the small metal piece).

If you remove the jumper your console will now work with the JAP settings. Just cut it with a knife or other tool, taking care not to damage the board. It’s that simple. if you want your console to work with other region settings just solder a cable to both points the jumper would be joining.
Now it’s easy to add a switch to change between settings. The easiest way is to cut the jumper in half, bend it and solder a cable to each of the ends. The other end of the cable will be soldered to a switch or button so you can open or close the circuit at will.

If you like, you can solder the wires directly to the pins on the PCB, for this remove the screws on the board and flip it. Again look at the country code to know where to solder.

Drill a hole through the case to locate the switch. A good place is at the back, besides the AV outputs (notice that the hole must be made on the top part of the case), once fitted it’s easier to solder the cables to the switch as it doesn’t move. (The other switch shown is for the 50Hz-60Hz mod)


Now you only have to close the case, put back the screws and admire your now modded Neo Geo CD!


Frame Rate Modification
This mod is for the PAL Neo Geo CD. For this mod you need to remove all screws so you can access the back of the green board you see at the bottom, behind the metal shield. Once the screws are removed flip the main board and locate the point shown in the picture you will see it clearly, where you read PAL.

You need to concentrate in the little box besides R26. You’ll notice there are two little metallic points joined by a black piece. Carefully remove this jumper (the black part). I removed it with a knife, forcing it upwards until it jumped off the board. You can try with an Exacto knife or something similar. Once it’s done your console will now show games at it’s full frame rate of 60Hz.

Now that the two metal points are separated you can add a switch to change between frame rates like you did before for the language mod and you’re done.

Do not switch between modes while the console is on as it could be damaged.
Important: Damage may occur to your Neo Geo CD console if not handled properly. Please follow this modification guide at your own risk. For additional support and discussions, visit the dedicated Neo Geo CD Forum.